Screeding
Serving Broadstairs, Ramsgate, Margate, Canterbury, Dover and surrounding areas
Floor screeding provides the smooth, level surface needed between a structural floor and its final covering. Whether you need a traditional sand and cement screed for a new extension, a self-levelling compound over an existing floor, or a screed to cover underfloor heating pipes, we deliver flat, accurate floors across East Kent.
What Is Floor Screeding?
A floor screed is a layer of material applied over a structural concrete slab or existing floor to create a smooth, flat surface ready to receive a final floor covering - whether that is tiles, wood, carpet, vinyl or resin. The screed provides the accurate level surface that flooring requires, while also serving to embed underfloor heating systems, conceal services, and provide thermal or acoustic separation.
Screeding is an essential part of most building, extension and renovation projects across East Kent. Without a properly laid screed, floor coverings will not sit flat, tiles will crack, and underfloor heating systems will not perform efficiently.
Lee on screeding work
Screeding sits alongside re-pointing as a specialist trade within the Perfect Plastering team. I handle plastering and rendering as my main work, and for floor screeding I pass jobs on to a specialist on the team who does it day in day out. The customer gets the right hands for the job, and we keep the whole project running through one contact. That includes screeding over underfloor heating, traditional sand and cement screeds and self-levelling compounds, the full range. If you’re enquiring about screeding, the call comes through me and lands with the right specialist.
Types of Screed
Traditional Sand and Cement Screed
The standard approach. A semi-dry mix of sharp sand and cement (typically 3:1 or 4:1 ratio) is laid by hand, compacted, and levelled using screeding rails and a straight edge. The surface is then finished with a float to the required texture - smooth for tiles or vinyl, slightly roughened to provide a key for adhesive.
Traditional screed is versatile, cost-effective and suitable for most domestic and commercial applications. We use it for:
- New extensions and conversions
- Covering underfloor heating systems
- Levelling existing floor areas
- Creating falls in wet rooms and shower areas
Materials are straightforward: quality sharp sand and Portland cement, sometimes with the addition of fibres (polypropylene or steel) for reinforcement, or additives to accelerate or retard the set as conditions require.
Self-Levelling Compound
Self-levelling compounds (SLC) are liquid products that are mixed and poured onto the floor, flowing to find their own level. They are ideal for:
- Levelling uneven existing floors where a thin (3-30mm) layer is needed
- Preparing floors for thin coverings like vinyl, laminate or engineered timber
- Achieving very tight tolerances on flatness (SR1 or SR2)
- Fast-track projects where the floor needs to be ready for covering quickly
We use self-levelling products from established manufacturers including Mapei, Weber and Ardex. These products set rapidly - many are walkable within 2-4 hours and ready for flooring within 24-48 hours, compared with weeks for traditional screed.
Fibre-Reinforced Screed
For larger areas or where cracking is a concern, we add polypropylene fibres to the traditional screed mix. These fibres are mixed into the screed and provide distributed reinforcement throughout the slab, reducing the risk of shrinkage cracking. Fibre-reinforced screed is particularly useful over underfloor heating, where the thermal cycling can stress a standard screed.
Lee on fibres in screed
Fibres get added where they’re needed rather than as standard. Over underfloor heating they’re worth specifying because the screed expands and contracts with the heating cycles, and the fibres reduce shrinkage cracking. On a standard floor with no heating and a sensible depth, fibres aren’t always necessary. The screed specialist on the team makes the call on each job based on the area, the depth, and what’s going under the screed.
Screeding Over Underfloor Heating
One of the most common reasons for screeding in East Kent homes is to cover underfloor heating (UFH) systems. As more homeowners move away from radiators - particularly in extensions, kitchen-diners and open-plan living areas - screeding over UFH pipes has become a regular part of our work.
The Process
- Insulation boards are laid across the floor area, typically 50-100mm of rigid PIR insulation such as Celotex or Kingspan
- UFH pipes are clipped or stapled to the insulation in the layout specified by the heating designer
- Edge insulation strip is fitted around the perimeter to allow for expansion
- The screed is laid over the pipes to the required depth - typically 65-75mm total, providing at least 25mm cover over the pipe
- The screed is levelled using screeding rails, compacted, and floated to a smooth finish
- Curing - the screed must cure for at least 21 days before the underfloor heating is commissioned, and even then, the temperature should be raised gradually over several days
Important Considerations
The screed mix for UFH needs to be right. Too much cement and the screed becomes too rigid, developing cracks as it expands and contracts with heating cycles. We use a carefully proportioned mix, often with the addition of fibres and a plasticiser, to produce a screed that is strong enough to perform but flexible enough to handle thermal movement.
We work closely with your UFH installer to coordinate timing. The heating system must be pressure-tested before we screed, as accessing leaking pipes under a finished screed is a costly exercise.
Lee on screeding over underfloor heating
The most important tip is pressure-test the UFH system before the screed goes down. Once that screed is poured, getting back to a leaking pipe is a serious job, and you don’t want to find out the hard way that the heating wasn’t properly installed. Beyond that, the cover depth over the pipes matters, at least 25mm of screed above the pipe for good heat transfer and to protect the pipe itself. And let the screed cure properly before you fire the heating up, ramping the temperature gradually rather than turning it on full straight away.
Our Screeding Process
1. Preparation
The floor area is cleared, cleaned, and checked for level. Any services (pipes, cables, ducts) that need to be below the screed are positioned and secured. We install screed rails (temporary levelling guides) at intervals across the floor, set precisely to the finished screed level using a laser level.
On concrete slabs, we apply a PVA or SBR bonding agent to ensure adhesion (for bonded screeds). Where a damp-proof membrane or insulation is present (unbonded screeds), the screed simply sits on top as a floating slab.
2. Mixing and Laying
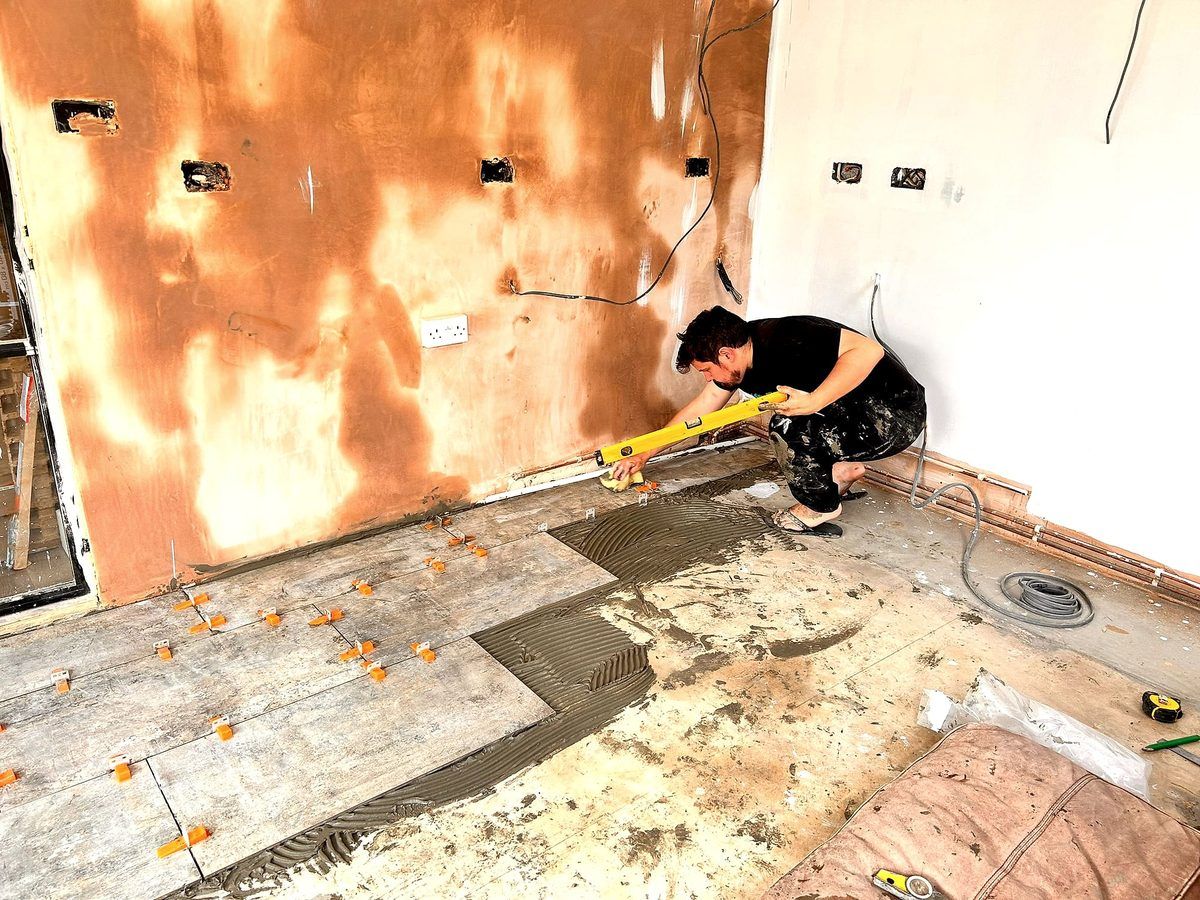
Traditional screed is mixed on site - either by hand for small areas or using a mixer for larger jobs. The mix is transported to the floor area, tipped between the screed rails, and compacted using a tamping bar. The surface is then ruled off using a straight edge drawn across the rails, removing excess material and filling any hollows.
3. Finishing
Once ruled off, the surface is worked with a hand float or power float to the required finish:
- Smooth float finish for tiles, vinyl and thin coverings
- Lightly textured finish for carpet and thicker coverings where a mechanical key helps adhesive grip
- Power-floated finish for exposed screeds in garages, workshops and commercial spaces
4. Curing
Proper curing is essential. We cover the screed with polythene sheeting for the first 7 days to prevent premature drying, which causes shrinkage cracking. After this initial period, the sheeting is removed and the screed is left to dry naturally. Windows should be opened for ventilation, and dehumidifiers can be used to speed the drying process.
Lee on curing screed
The killer for fresh screed is drying out too quickly. So the rule is: cover it with polythene for the first seven days minimum, keep the moisture in, let it cure slowly. After that you can take the sheeting off and start ventilating gradually. Dehumidifiers help if you need to speed things along, but don’t blast hot air at it. Patience on curing pays back in a screed that doesn’t crack.
Floor Flatness and Tolerances
The required flatness of a screed depends on what floor covering is going on top:
- Tiles - the screed must be flat enough to avoid lippage (height difference between adjacent tiles). A tolerance of 3mm under a 2-metre straight edge is typical
- Vinyl and thin coverings - these show every imperfection in the floor below, so tighter tolerances are needed. Self-levelling compounds are often specified for this reason
- Carpet - more forgiving, but major undulations will be felt underfoot
- Engineered timber and laminate - most manufacturers specify a tolerance of 3mm in 2 metres
We check flatness throughout the screeding process using a laser level and straight edges, and carry out a final check before handover.
Screeding Across East Kent
We carry out screeding work across the full range of East Kent property types:
- New-build extensions in Canterbury, Whitstable and Herne Bay
- Kitchen and bathroom renovations requiring new level floors
- Loft and garage conversions where a new floor surface is needed
- Commercial premises including shops, offices, restaurants and workshops
- Period property renovations where existing floors need levelling
Whether it is a single room in a terraced house in Deal or the ground floor of a new build in Faversham, we approach every screeding job with the same attention to preparation, mix design and finishing.
Getting a Quote
We provide free quotations for all screeding work across East Kent. We visit the site, measure the area, check levels, and discuss the specification with you or your builder. Prices start from £20 per square metre for traditional screed, with self-levelling compounds priced separately depending on the product and depth required. We cover Canterbury, Whitstable, Herne Bay, Faversham, Dover, Deal, Sandwich, Ramsgate, Broadstairs, Margate and all surrounding areas.
Frequently Asked Questions
What is the difference between a screed and concrete?
How thick does a floor screed need to be?
How long does screed take to dry before I can lay flooring?
Can you screed over underfloor heating?
What is self-levelling screed?
Do I need a screed for tiling?
Can you screed a garage floor?
What causes screed to crack?
Ready to Get Started?
Contact us today for a free, no-obligation quote on your screeding project. We serve all areas across East Kent.
What Customers Say About Our Screeding
5.0Lee has been helping me transform my bungalow over the last couple of years. I've been very happy with his work and his rates. A jolly decent chap as well ! Thanks Lee.
5.0Lee is friendly, knowledgeable, reliable, affordable - and an excellent plasterer! We are very happy with his work and will definitely use him again. Thoroughly recommended.
5.0Positive: Responsiveness, Punctuality, Quality, Professionalism, Value