Rendering
Serving Broadstairs, Ramsgate, Margate, Canterbury, Dover and surrounding areas
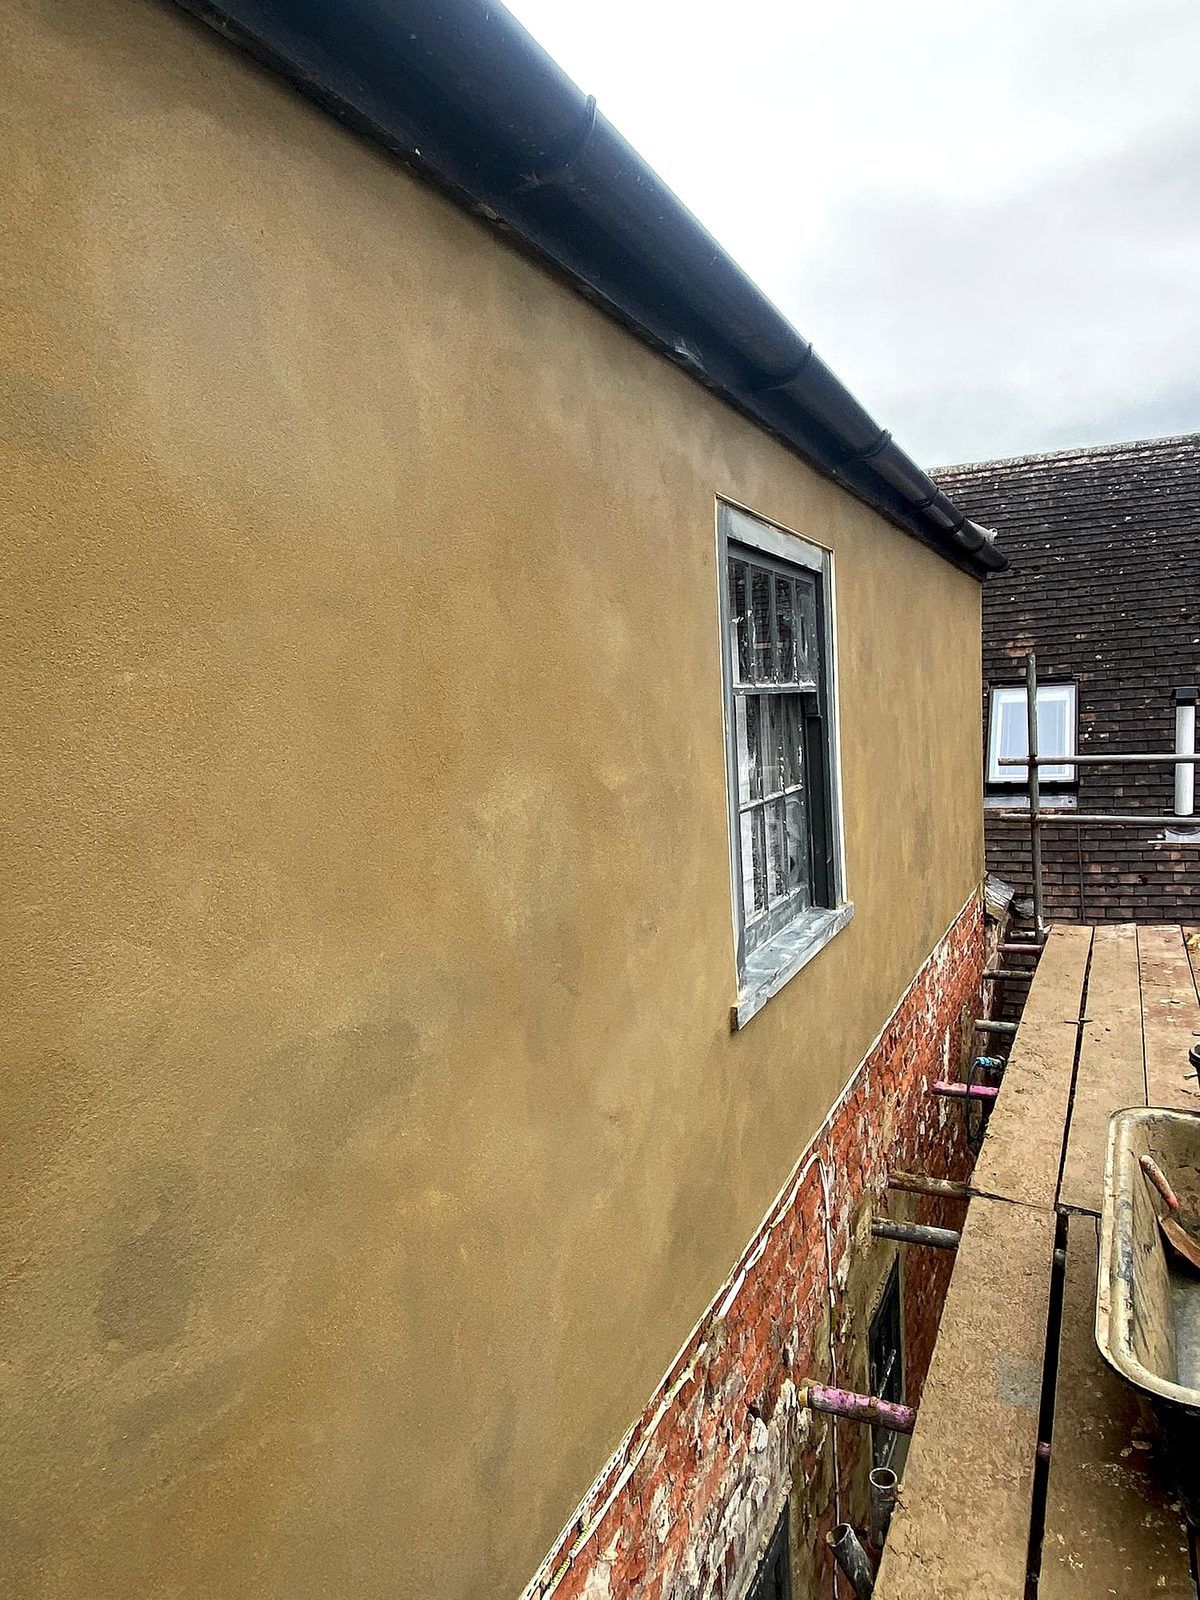
Sand and cement rendering is the traditional method of finishing and protecting exterior walls. Applied as a two or three-coat system, it provides a durable, weather-resistant surface that can be painted in any colour. We carry out all types of exterior rendering work across East Kent, from small domestic repairs to full house renders.
What Is Sand and Cement Rendering?
Sand and cement rendering is the traditional method of finishing exterior masonry walls. A mixture of sharp sand, cement and water (sometimes with lime or a plasticiser added for workability) is applied by hand to the outside of a building, typically in two or three coats, to create a flat, weather-resistant surface. Once cured, the render is painted with masonry paint to provide colour and additional waterproofing.
This is the most common form of exterior wall finish in the UK and has been used for well over a century. Across East Kent, you will see sand and cement render on everything from Victorian terraces in Dover and Deal to 1960s bungalows in Herne Bay and modern extensions in Canterbury.
Lee on traditional vs modern render
About 70% of the rendering I do now is modern systems, monocouche and silicone, and 30% is traditional sand and cement. The shift has happened over the last few years because the modern products have got better, especially on waterproofing. That said, sand and cement isn’t going anywhere. It’s a proven system, it’s cheaper, and on listed buildings or where longevity matters more than cosmetics, it’s still my recommendation.
When You Need Rendering
There are several reasons to render or re-render your property:
- Bare blockwork or brickwork on extensions, new builds or conversions that needs finishing and protecting
- Failed or blown render that is cracking, bulging or falling away from the wall
- Weather protection for solid-walled properties that suffer from rain penetration
- Appearance - covering mismatched brickwork, previous alterations or generally tired-looking walls
- Thermal improvements - render can be applied over external wall insulation as part of an energy upgrade
Many properties across East Kent were originally rendered 30-50 years ago, and that render is now reaching the end of its life. Cracking, hollow-sounding patches and damp patches appearing on internal walls are all signs that re-rendering may be needed.
Lee on what East Kent customers call about
Most calls I get for rendering are full whole-house renewals, not small repair patches. The old render has blown, water’s getting behind, the wall’s damp inside, and the customer wants the lot doing properly rather than another patch job that’ll fail in two years. A typical whole-house render, including hacking off, scratch coat and base coat, takes about two to three weeks depending on the size. Rendering is weather-dependent, so I’ll always tell customers at the start of the job that we can’t work in the rain, and we agree how we handle bad weather before I lift a trowel.
Our Rendering Process
1. Preparation
Proper preparation is the foundation of a good render job. We:
- Remove failing render by hacking off any blown, hollow or cracked sections back to sound masonry
- Rake out mortar joints on bare brickwork to provide a mechanical key for the render
- Clean the wall surface removing loose material, dust, moss and algae
- Apply a bonding agent (SBR or PVA) where needed to improve adhesion on smooth or low-suction surfaces
- Fix stainless steel beading to all external corners, window reveals and stop edges to ensure clean, straight lines
- Apply stainless steel mesh over any cracks, movement joints or where dissimilar materials meet to reinforce the render
2. Scratch Coat (First Coat)
The first coat, typically 8-10mm thick, is applied firmly to the wall and then scratched horizontally with a comb or scratcher while still wet. These scratches provide a mechanical key for the next coat to grip onto. We use a mix of sharp sand and cement, usually at a 4:1 or 5:1 ratio depending on the background, with a plasticiser (such as Feb Mix Plus) to improve workability.
3. Floating Coat (Second Coat)
Once the scratch coat has cured (typically 24-48 hours minimum), the floating coat is applied. This coat brings the surface to a consistent, flat plane. We use screeding rails and straight edges to ensure the wall is true and plumb. This coat is ruled off flat and then left with a light scratch or roughened surface to key the final coat.
4. Finishing Coat
The top coat is the thinnest layer, applied to achieve the desired surface texture. For a smooth finish, this coat is worked with a wooden or sponge float to a flat, even surface. The finishing coat mix is slightly richer (more cement) and uses finer sand to produce a smoother texture.
5. Curing and Painting
After application, the render needs to cure for at least 28 days. During this time, we advise keeping the render damp in hot weather (by light misting with water) to prevent it drying out too quickly, which can cause cracking. Once cured, the surface is painted with a good quality masonry paint. We recommend brands such as Dulux Weathershield or Sandtex 365 for their durability and weather resistance.
Lee on mix ratios
For traditional sand and cement rendering I use a four-to-one sand-to-cement ratio. If a wall needs to breathe, on an older or listed building, I’ll use a 50/50 sand and lime mix with water, no cement at all. The lime mix lets the building breathe, which is what older buildings need. Cement traps moisture in the wall, which is why you see damp problems on properties that have been rendered in straight cement without thinking about what’s behind. Get the mix wrong and you cause damp, not stop it.
Materials
Traditional sand and cement render uses widely available, proven materials:
- Sharp sand (also called plastering sand or rendering sand) - the main aggregate, sourced locally wherever possible
- Ordinary Portland Cement (OPC) - the binding agent
- Hydrated lime - sometimes added to improve workability and flexibility, reducing the risk of cracking
- Plasticiser - a liquid additive (Feb Mix Plus or equivalent) that introduces air bubbles to improve workability and frost resistance
- SBR bonding agent - used to prime smooth or difficult backgrounds
- Stainless steel beading - corner beads, stop beads and bellcast beads from manufacturers like Catnic or Simpson Strong-Tie
- Render mesh - alkali-resistant fibreglass mesh for reinforcement over cracks and junctions
We use stainless steel rather than galvanised beading on all exterior work. In the coastal East Kent environment, standard galvanised beads can corrode within a few years, leading to rust staining and failure. Stainless steel costs a little more but lasts the life of the render.
Lee on coastal beading
Anything near the seaside, stainless steel beads only. Galvanised will corrode and rot away on the coast, and once the bead goes you’ve got rust staining bleeding through the render and the edge starts to fail. On modern monocouche and K Rend systems I use plastic beads now, because they don’t rot or corrode at all. The extra cost on stainless or plastic beads is nothing compared to having to redo the render in five years.
Sand and Cement vs Modern Render Systems
Traditional sand and cement render remains a perfectly valid choice, but it is worth understanding how it compares with modern alternatives like monocouche and silicone renders:
Advantages of sand and cement render:
- Lower material cost (from £30 per square metre applied)
- Any colour achievable through painting
- Easy to repaint and change colour in future
- Familiar to all builders and plasterers
- Readily available materials
Disadvantages compared with modern systems:
- Requires painting (additional cost and ongoing maintenance)
- Can crack if the mix or application is wrong
- Less breathable than lime-based renders
- No self-cleaning properties
- Colour fades and needs repainting every 5-7 years
For many East Kent properties, sand and cement render remains the right choice - particularly where budget is a factor, where the render will be painted to match a specific colour, or where the property already has sand and cement render and a like-for-like replacement is most appropriate.
Lee on when to choose traditional render
For listed buildings and anywhere longevity is what matters most, I’ll recommend traditional sand and cement. It’s a proven system, it’s been on buildings for a hundred years, and you know what you’re getting. Modern products keep improving, but they haven’t been on a wall for a hundred years yet so you can’t say with the same certainty. The other reason to go traditional is budget. Sand and cement is the cheapest system in terms of materials, and if you’re planning to paint it anyway, you’re not losing anything by skipping the coloured render premium.
Common Rendering Problems
Cracking
Fine hairline cracks are common and usually cosmetic, filled during repainting. Wider cracks (over 2mm) may indicate movement in the building or poor render mix and need investigation before repair.
Blown Render
Render that sounds hollow when tapped has lost its bond with the wall behind. This typically needs hacking off and replacing, as re-bonding is rarely successful.
Damp Patches
If damp appears on internal walls behind rendered surfaces, the render may be letting water through via cracks, or moisture may be tracking around the edges of the render. Proper detailing with bellcast beads at the base and sealed edges at windows and doors prevents most water ingress.
Getting a Quote
We offer free quotations for all rendering work across East Kent. We assess the condition of your existing walls, discuss the best approach, and provide a clear price with no hidden extras. We cover Canterbury, Whitstable, Herne Bay, Faversham, Dover, Deal, Sandwich, Ramsgate, Broadstairs, Margate and all areas in between.
Frequently Asked Questions
How long does sand and cement render last?
What is the difference between two-coat and three-coat render?
Can you render over existing render?
When should I repaint my rendered walls?
What finish options are there for sand and cement render?
Will rendering stop damp in my walls?
How long does new render take to cure before painting?
Ready to Get Started?
Contact us today for a free, no-obligation quote on your rendering project. We serve all areas across East Kent.
What Customers Say About Our Rendering
4.8Making good and rendering of external walls.
Not an easy job to carryout as the original walls were very uneven and existing brickwork was soft and crumbly but the work was completed to a very good standard
5.0Lee has been helping me transform my bungalow over the last couple of years. I've been very happy with his work and his rates. A jolly decent chap as well ! Thanks Lee.
5.0Lee is friendly, knowledgeable, reliable, affordable - and an excellent plasterer! We are very happy with his work and will definitely use him again. Thoroughly recommended.