Plastering
Serving Broadstairs, Ramsgate, Margate, Canterbury, Dover and surrounding areas
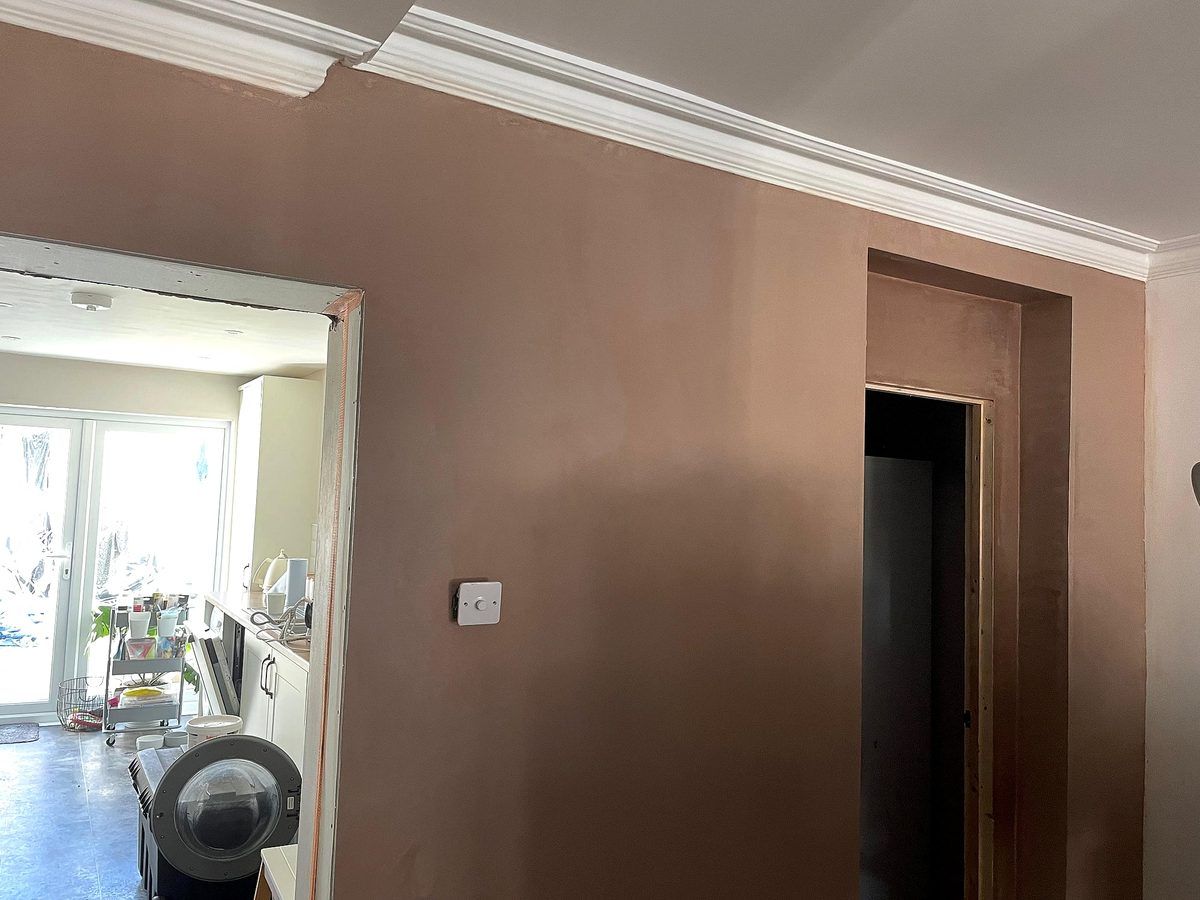
From new-build walls to full replasters of tired rooms, our wet plastering service delivers smooth, durable finishes that stand the test of time. We use traditional two-coat and finishing plaster systems to give your walls and ceilings the perfect base for decoration.
What Is Wet Plastering?
Wet plastering is the traditional method of finishing interior walls and ceilings using gypsum-based plaster applied by hand with a trowel. Unlike dry lining, which involves fixing plasterboard and taping joints, wet plastering produces a seamless, solid surface with no joints or fixings visible. It is the gold standard for interior wall finishing and remains the preferred choice for most homeowners and builders across East Kent.
Lee on wet plaster vs dry lining
I’m comfortable with both, I do both, and the right choice depends on the wall and the job. Wet plaster on a solid brick or block wall gives you a denser, more durable finish, and that’s still my preferred approach in most older Kent homes. Dry lining has its place though, for new-build interiors, partitions, anywhere you need to insulate behind the board or run services. When customers ask which is better, I’ll tell them straight: there isn’t one better answer, there’s one that’s right for that wall.
When we talk about plastering, we are usually referring to a full wet plaster finish applied over either a masonry wall (brick or block) or over plasterboard that has been fixed as part of a dry lining system. The result is the same: a flat, smooth surface ready for paint or wallpaper.
When You Need Professional Plastering
There are several situations where a full plastering job is the right call:
- New extensions or conversions where fresh blockwork walls need finishing
- Full room replasters when existing plaster is blown, hollow or beyond repair
- After removing old tiles in kitchens and bathrooms where the wall surface is damaged
- New-build finishing where plasterboard walls and ceilings need a skim finish
- Period property restoration where old lime plaster has deteriorated and needs replacing
Many homes across Canterbury, Whitstable, Herne Bay and the wider East Kent area were built between the 1930s and 1970s, and their original plaster is now reaching the end of its useful life. If you tap your walls and hear a hollow sound, or notice hairline cracks spreading across the surface, it is likely time for a replaster.
Lee on the jobs he sees most
About 70 to 80% of what I do is skim coating, going over plasterboard or existing walls that have had their day. The rest is full replastering, which usually means hacking off old damp walls and starting from scratch on the brick. The pattern I see most across East Kent is older properties, Victorian terraces along the coast, 1930s semis inland, where the original plaster has finally given up, often because of damp getting in through tired render or poor ventilation. Coastal areas like Margate, Cliftonville and Herne Bay throw up more damp jobs than anywhere else, almost always tied to ventilation problems in the property itself.
Our Plastering Process
1. Assessment and Preparation
Every job starts with a proper look at the existing walls. We check for damp, blown plaster, structural cracks and anything else that needs addressing before we start. On masonry walls, we rake out loose material and apply a PVA or bonding agent to ensure the new plaster grips properly.
2. Backing Coat Application
For walls that need building up or levelling, we apply a backing coat using British Gypsum Thistle Bonding Coat on smooth or low-suction surfaces, or Thistle Hardwall on standard masonry. This coat is typically 8-11mm thick and is scratched while wet to provide a key for the finishing coat. We use metal beading on all external corners and stop beads at edges to ensure clean, straight lines.
3. Finishing Coat
Once the backing coat has set (usually the following day, though sometimes same-day depending on conditions), we apply a 2-3mm finishing coat of Thistle Multi-Finish. This is the skill-intensive stage where the plaster is worked to a smooth, flat surface through multiple trowelling passes. The final result should be free of trowel marks, ripples and imperfections.
Lee on finishing plaster
My go-to is Thistle Multi-Finish. It’s a no-brainer: it works on plasterboard, it works on a backing coat, it’s easy to get hold of at any local supplier. When I’m skimming straight onto plasterboard, Board Finish gives you a slightly better result, so I’ll use it where I can. But Multi-Finish covers ninety percent of jobs and I know exactly how it behaves. I use a thinner finishing trowel for the final coats, different trowel to the one I’d use for rendering or the initial application. The trowel matters more than people realise.
4. Drying and Aftercare
We advise customers on proper drying after the job. Gentle ventilation helps, but avoid blasting heaters at fresh plaster as this can cause cracking. Once fully dry, a mist coat of watered-down emulsion (roughly 70/30 paint to water) should be applied before your first full coat of paint.
Materials We Use
We work exclusively with British Gypsum Thistle products for interior plastering. This is not about brand loyalty for its own sake; Thistle plasters are manufactured in the UK, are consistently reliable, and are the industry standard that decorators and surveyors expect to see. Specifically, we use:
- Thistle Bonding Coat for low-suction and smooth backgrounds
- Thistle Hardwall for standard masonry backgrounds
- Thistle Multi-Finish as our go-to finishing plaster
- Thistle Board Finish when skimming over plasterboard
- Blue Grit bonding agent for difficult or painted surfaces
We also use galvanised metal beading from reputable suppliers, stainless steel where there is any risk of moisture exposure, and quality PVA from Unibond or similar.
Lee on the materials he relies on
A few things I rely on. For backing coats: bonding for filling big holes and gaps, hardwall for larger areas or anywhere there’s water about, bathrooms, toilets, because hardwall holds up better than bonding, which is more porous. For sealing walls before plastering I use PVA, but the bigger game-changer in the last few years has been grit PVA, yellow, red or blue grit depending on the surface. If a ceiling is too glossy or a wall isn’t keying properly, grit sealant gives the plaster something to bite onto. That’s made a real difference. The one thing I avoid is Artex. I won’t apply it unless a customer specifically asks. It’s dated and there are better ways to get a textured finish if that’s what you want.
Benefits of Professional Plastering
Seamless finish - Unlike dry-lined and taped joints, wet plaster gives a continuous surface with no visible seams, which is especially important in older properties where character matters.
Durability - A properly applied plaster finish will last decades. It is hard-wearing, resistant to minor knocks and provides a solid surface for hanging pictures, shelves and fixtures.
Fire resistance - Gypsum plaster is naturally fire-resistant, adding a layer of passive fire protection to your walls and ceilings.
Sound dampening - The density of wet plaster provides better acoustic performance than a plasterboard-only finish, reducing sound transfer between rooms.
Value for money - While the upfront cost is slightly higher than a tape-and-jointed dry lining finish, the longevity and quality of a wet plaster finish means fewer problems and redecorating cycles down the line.
Plastering in Older Kent Properties
East Kent has a mix of property ages and styles, from Victorian terraces in Deal and Dover to 1930s semis in Canterbury and post-war estates in Thanet. Each presents different challenges. Older properties may have original lime plaster on lath that needs careful assessment. 1960s and 70s homes often have a rough sand-and-cement render internally that was designed for a thick wallpaper covering rather than modern paint finishes.
We assess each property on its own merits and recommend the right approach. Sometimes a skim coat over the existing surface is perfectly adequate. Other times, stripping back to the masonry and starting fresh is the only way to get a proper result.
Lee on the trickiest local jobs
The trickiest jobs are the high-ceiling ones, anything that needs proper scaffolding inside. Big Victorian rooms in places like Margate where you’ve got 10 or 12 foot ceilings, that’s where the time and the cost go up. The other recurring challenge is coastal damp. Margate, Cliftonville, Herne Bay, older properties with poor ventilation get damp problems that you can’t just plaster over. I’ll always check the wall first. If the brick is wet you need to deal with that before you skim, otherwise you’re back in six months patching the same wall. The other one that catches people out is dot-and-dab plasterboard on an unstable wall. I had one job where I pulled the boards off and a whole column of bricks came out with them because the bricklayer who put it up years before had done a poor job. You don’t know what you’re dealing with until you start.
Getting a Quote
We offer free, no-obligation quotes for all plastering work across East Kent. We will visit your property, assess the scope of work, and provide a clear, written quotation with no hidden costs. Most standard room replasters can be quoted on the spot.
Frequently Asked Questions
How long does fresh plaster take to dry before I can paint?
Do I need to replaster my whole room or just patch the bad areas?
What is a two-coat plastering system?
Do you move furniture before plastering?
How messy is plastering?
Can you plaster over old wallpaper or painted walls?
What is the difference between plastering and rendering?
Do you plaster ceilings as well as walls?
Ready to Get Started?
Contact us today for a free, no-obligation quote on your plastering project. We serve all areas across East Kent.
What Customers Say About Our Plastering
5.0We used Lee from Perfect Plastering to plaster our house from top to bottom. Lee was friendly, efficient and his rates are competitive. Recommended!!
5.0Lee has been helping me transform my bungalow over the last couple of years. I've been very happy with his work and his rates. A jolly decent chap as well ! Thanks Lee.
5.0Lee is friendly, knowledgeable, reliable, affordable - and an excellent plasterer! We are very happy with his work and will definitely use him again. Thoroughly recommended.